Check out the video:
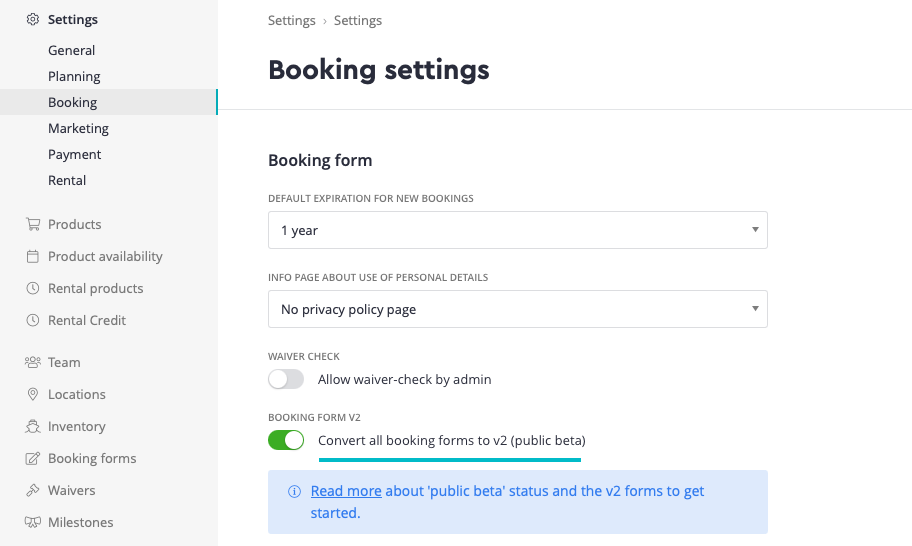
1. Enable the V2 forms for all existing bookings forms.
To make things as easy as possible, we've built one toggle that will instantly convert your existing booking forms to the V2 forms. This will keep all settings intact but it will have all the 'under the hood' improvements.
In Settings > Booking: Convert all bookings forms to V2
2. Understanding the booking form flow
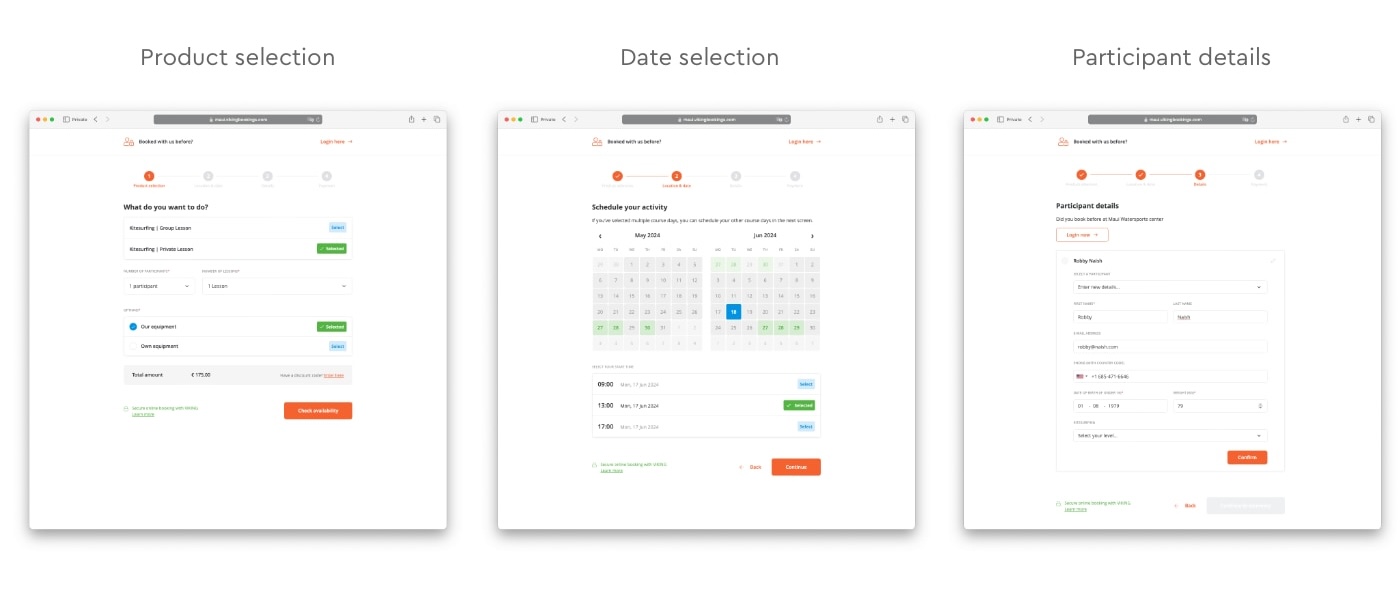
The v1 booking forms consisted of 3 steps:
Product selection → Date selection → Personal details
The v2 Booking forms expand on this with two additional steps, creating the following flow:
↓
Booking form (Product selection → Date selection → Personal details)
↓
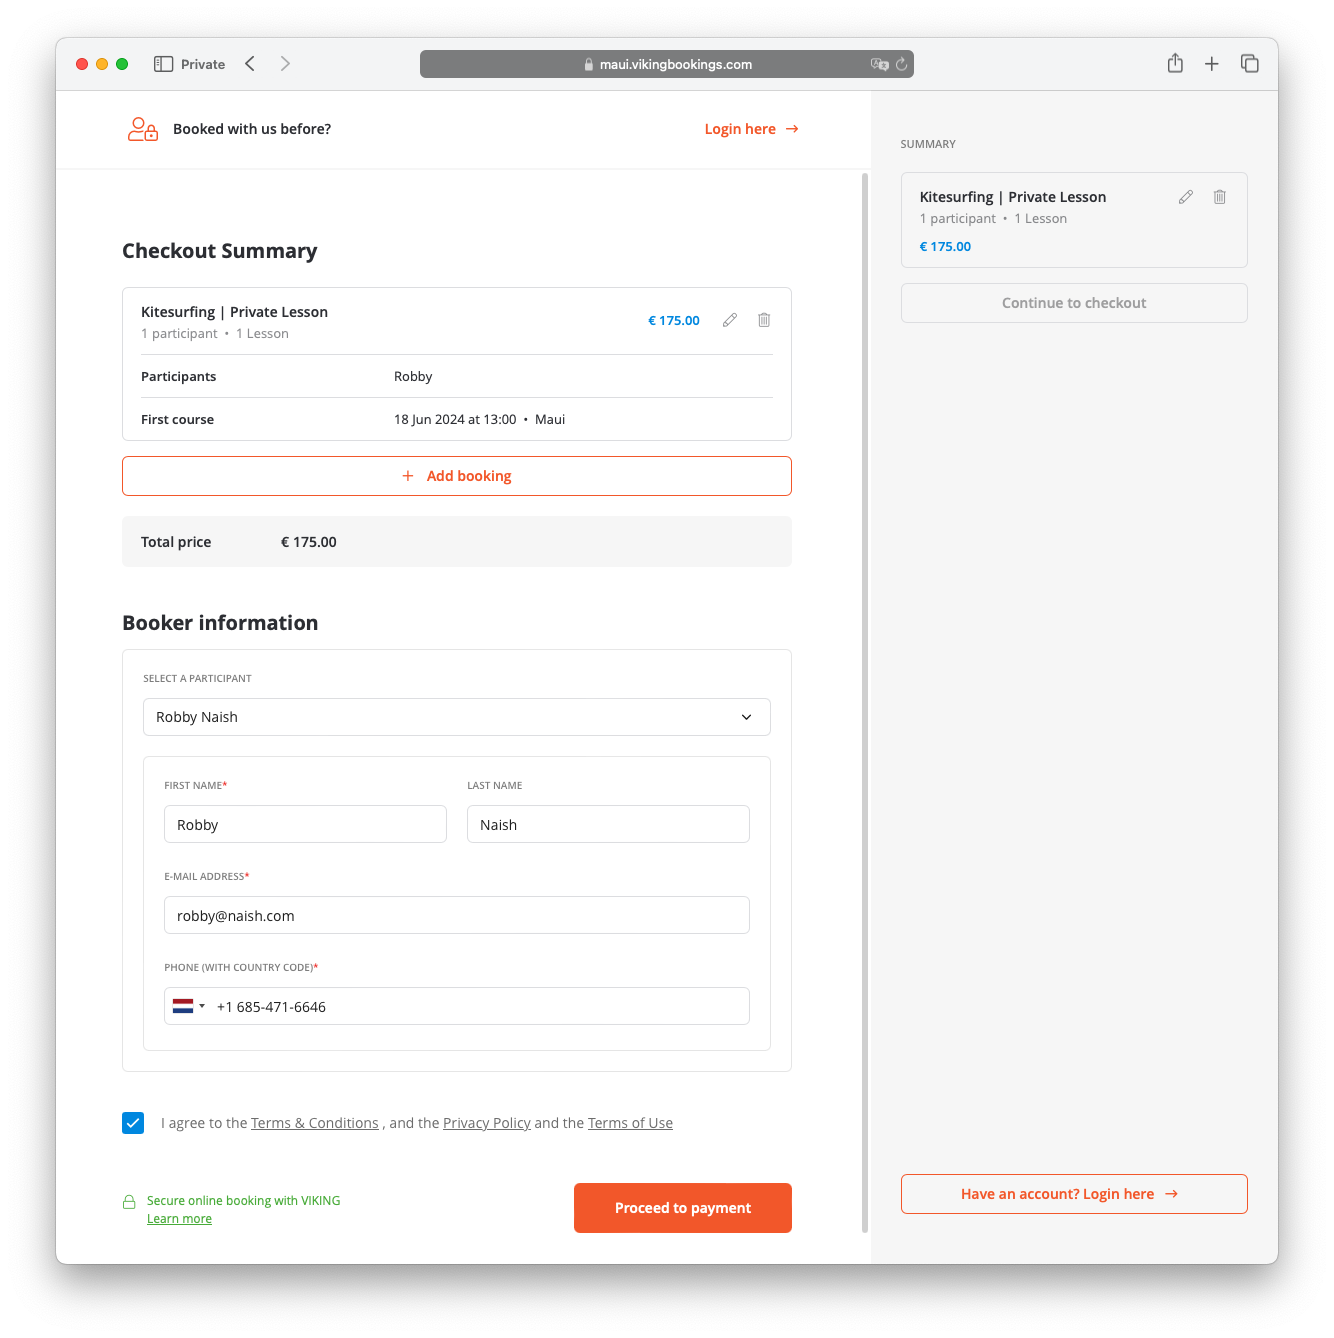
Summary page
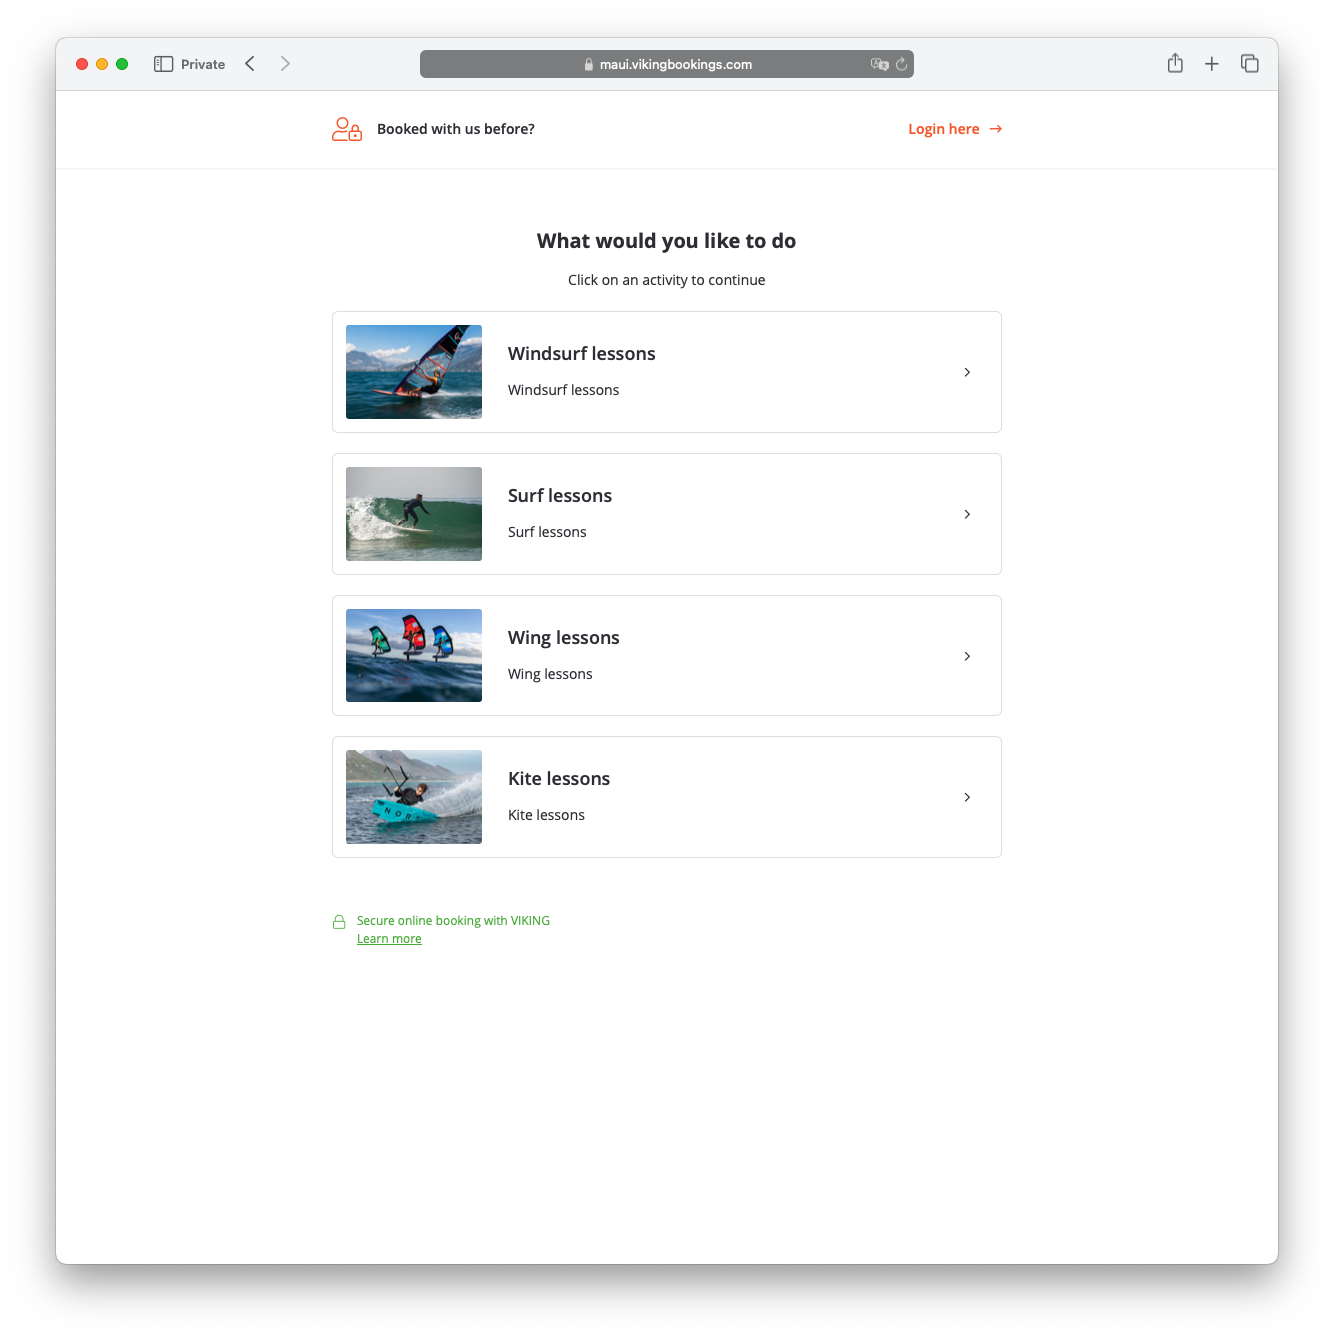
The overview page
Every block links to a different booking form, with their respective settings.
The booking form
This flow remains the same as the v1 booking forms.
The summary page
Customers can check their booking and have the possibility to click '+Add Booking'. This will link back to the overview page to repeat the flow. All the bookings are displayed in the Shopping cart in the sidebar.
3. Creating the individual booking form(s)
First prepare the individual booking forms that you want to use, then combine them in a group to create the correct URL's (widget links) for your website.
Go to: Settings > Booking Forms
For every booking form, an image and text will be displayed on the Overview page:
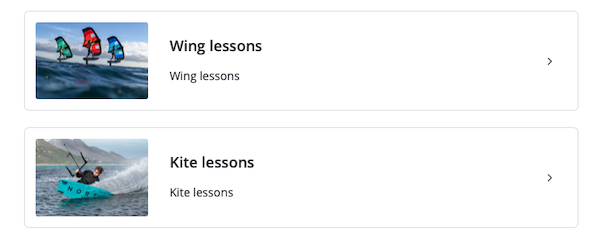
These can be changed in the booking form settings. The overview page will display the form title, with the image and description fields.
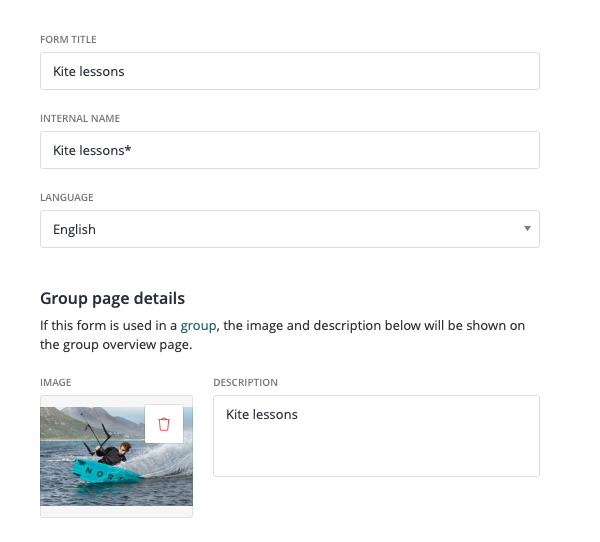
- In our example, we have created 4 different bookings forms: one for wing lessons, kite lessons, surfing and SUP lessons.
- Note that you can have different settings for each booking form. For instance it's possible to make different custom and/or required fields.
- All the custom text in the booking forms (sidebar, intro text, date selection text) can be different in every form.
4. Create the booking form group with URL of the Overview page
Go to: Settings > Booking Forms > Groups and click +Create booking form group
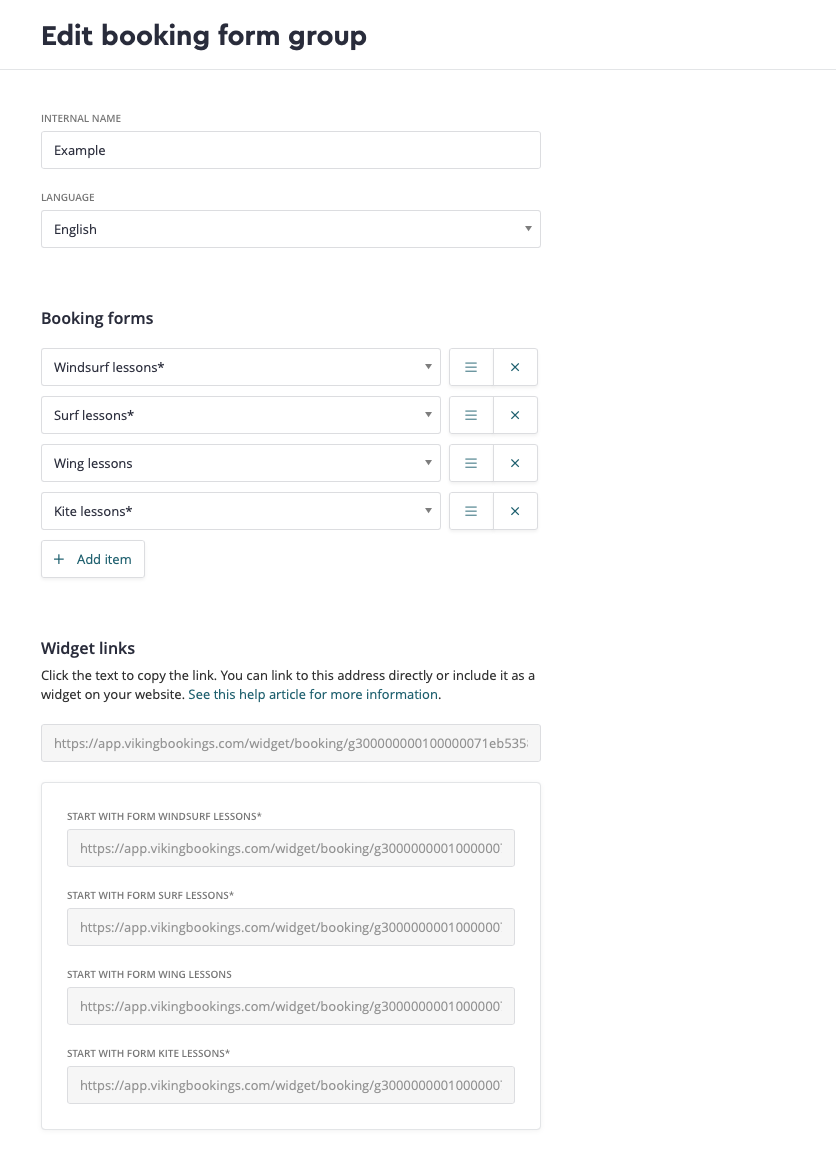
- Name the group and set the language.
- Add the booking forms that you want to show on this Overview page
4.1 Using the links on your website
Starting with the Overview page
The top link will open the Overview page when it's used on your website, usually serving as your general booking form.
Starting with individual booking forms
Below you will find individual links for each booking form. These make it possible to create buttons on your website that start with a specific booking form, but when customers click 'Add extra booking' on the summary page they get to see the overview page (with all the sports).
5. Tips and examples
This is the setup we recommend for most schools. It allows you to use the Overview page as a main booking form, while on specific product pages you link to the 'start with booking form' pages.
• Basically the Overview page will have a listing for every 'category' that you are currently using. And now you can add an image as well.
• Product pages immediately start on the right booking form and still give customers the option to add other types of lessons later.
• We repeat: the setting for every individual booking form can be different.
This could be done per sport. It allows you to use a different overview page image for lessons and rentals.
• Use several different overview pages (one per sport, each with rental and lessons)
• This allows you to use the 'categories' in the booking form for different info, such as duration.
Signing up for a camp often requires more 'custom fields' in your booking form than booking a lesson. Using a camp-specific form in an Overview page ensures that customers fill out the detailed info only when they select the camp.