Note: To place the plugin on your website you need access to Plugins in WordPress.
Install the plugin from WordPress
To integrate the booking forms into your WordPress website, you only need to install our handy WordPress plugin. You do this as follows:
- Log in to your WordPress website and go to management (wp-admin).
- Go to "Plugins" in the menu on the left side of the screen.
- Click on "New plugin" at the top of the screen.
- Enter "Viking Bookings" in the search field on the right side of your screen and hit enter.
- The Viking Bookings plugin comes into play. Click the "Install Now" button.
Then choose "Activate". - The plugin has been activated and you can now use the booking forms in your website!
Install the plugin manually
In some cases it is not possible to install plugins from the WordPress management environment. You can then also install the plugin manually.
Note: This method requires you to be able to upload files and requires some technical knowledge.
- Go to the WordPress plugin page at wordpress.org. You can find this via https://wordpress.org/plugins/viking-bookings/
- Click on the blue "Download" button.
- Open the zip file that will be downloaded.
- Place the folder "Viking-bookings" and its files on the server (via FTP) in the folder wp-content / plugins.
- Log in to your WordPress website and go to management (wp-admin).
Go to "Plugins" in the menu on the left side of the screen. - Click on "Activate" at the plugin Viking Bookings.
The plugin has been activated and you can now use the booking forms in your website!
Set up the plugin for floating button
To use the "floating" "Book now" button at the bottom of the screen of each page, you need to enter a number of settings. This option is disabled by default.
- Log in to your WordPress website and go to management (wp-admin).
- Go to Settings> Viking Bookings from the menu on the left side of the screen.
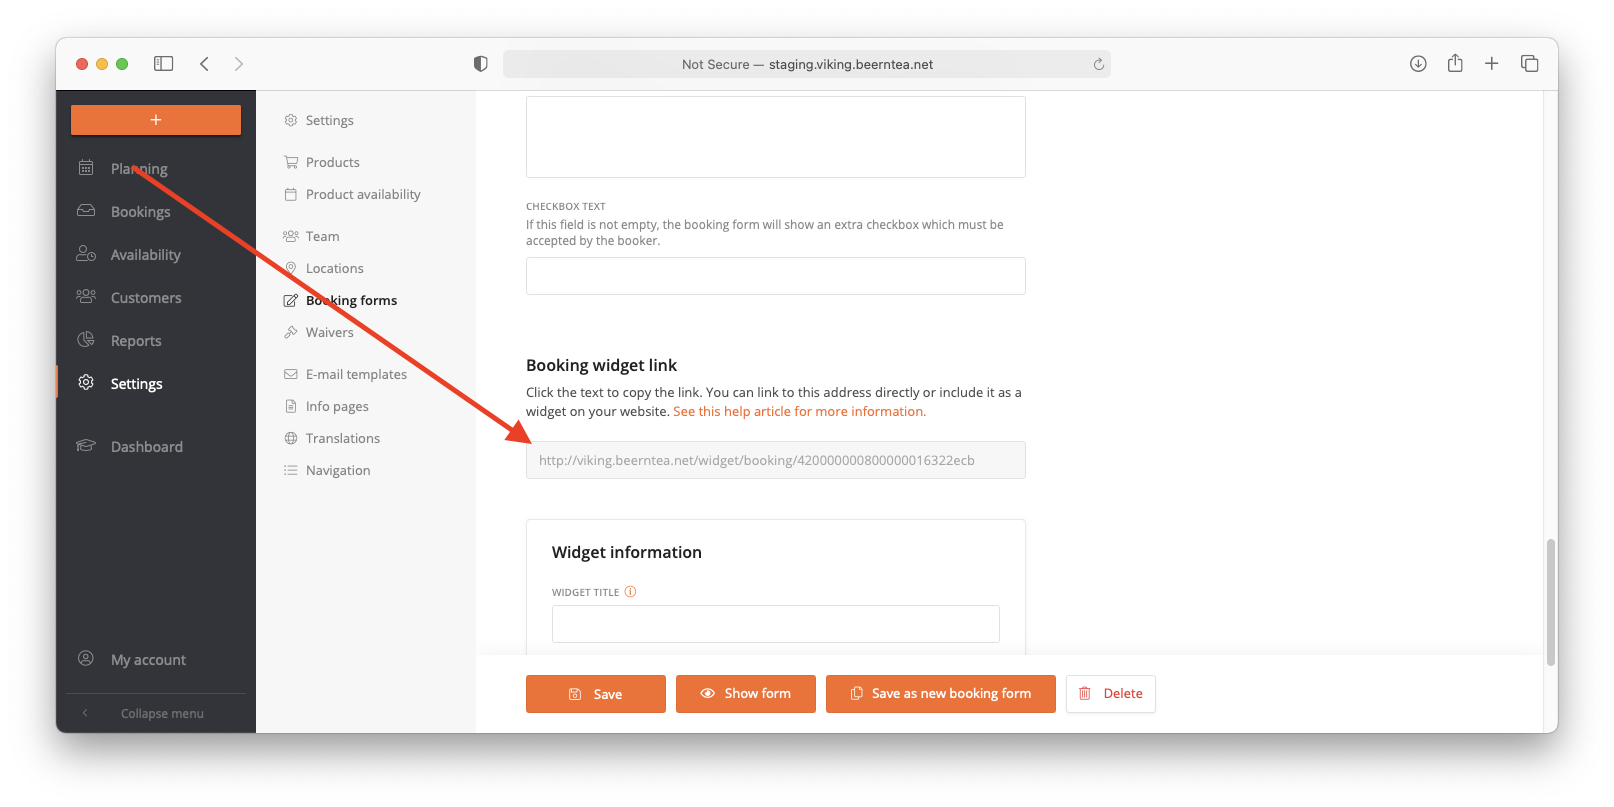
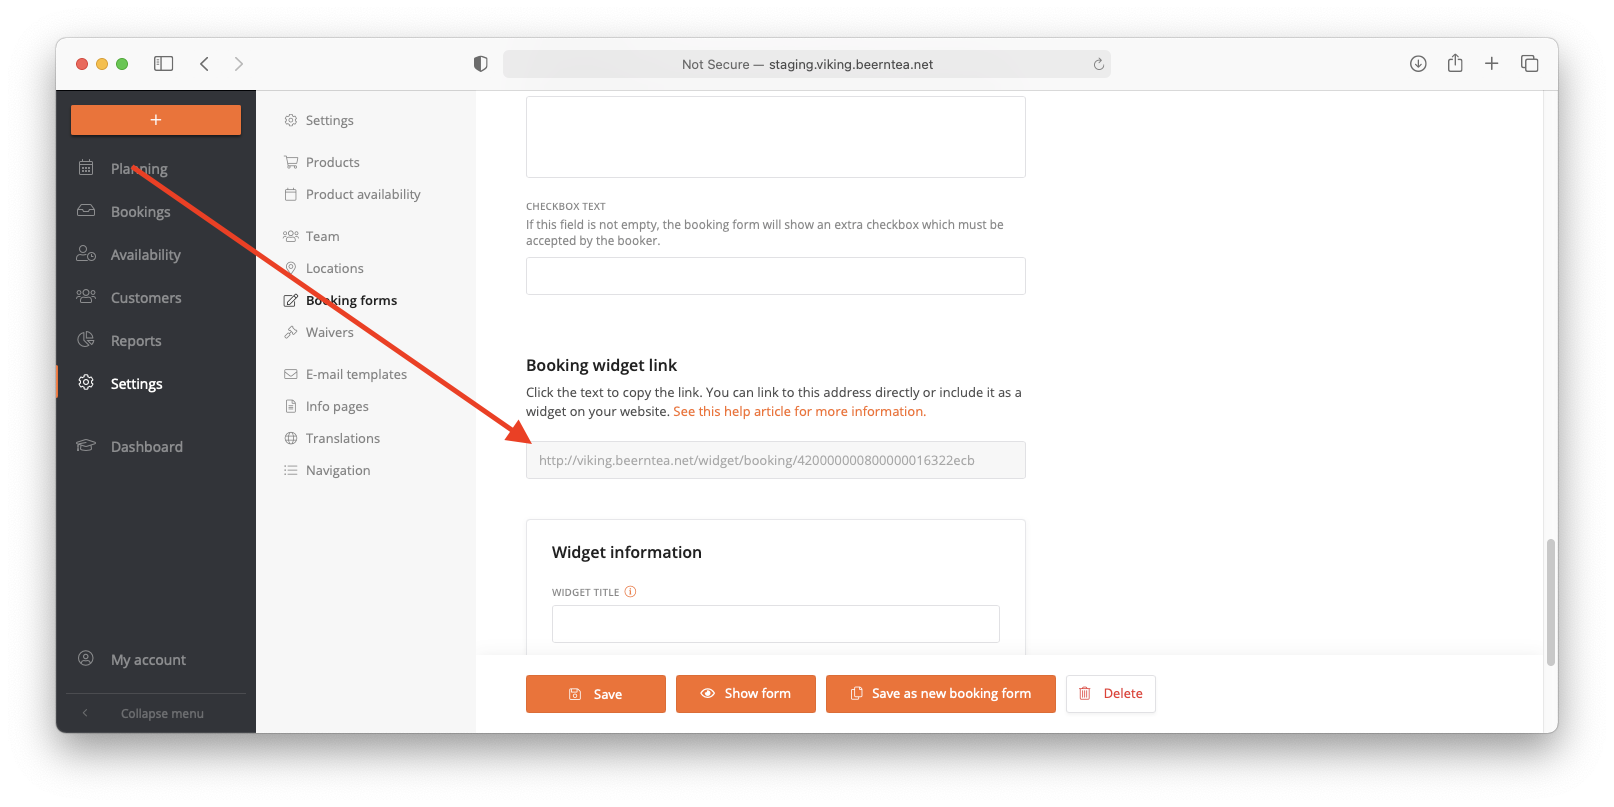
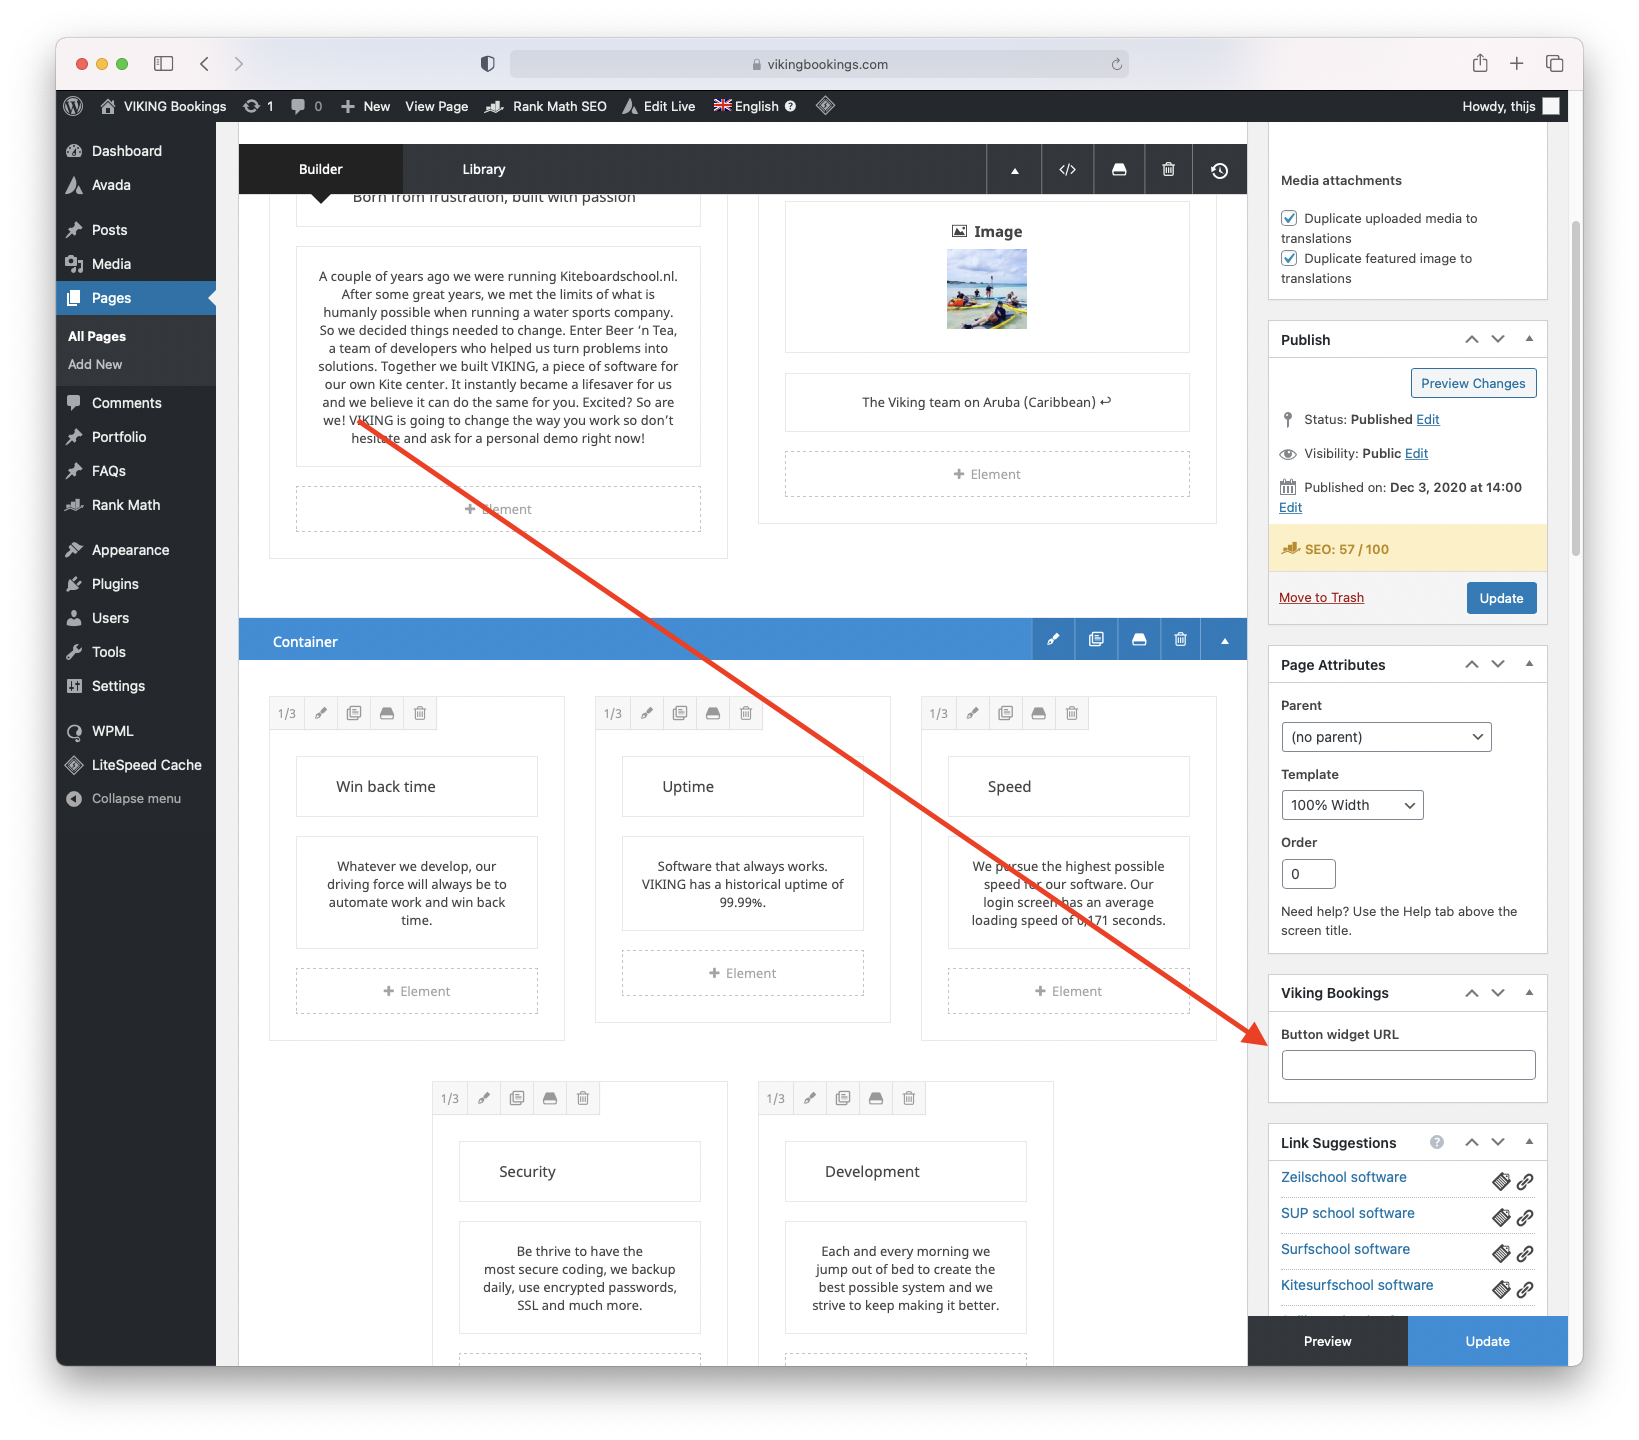
- Enter the Booking form URL of the request booking form you want to use for the floating button. Can find it in settings -> booking forms -> click the booking form -> Booking form URL:
- Via "Primary color" you can set the color of buttons in the request module.
- The floating button can be placed on the left or right side of the screen and you can adjust how far the button is from the edge of the screen.
- You can still adjust the Booking form URL per page. That way you can use different booking forms on specific pages than you have set as default.
The alignment for the floating button on mobile screen can be determined in the Booking Form settings.
Set up the plugin for buttons on your website
If you want to use the new booking form on buttons on your website, link the button of your website to the Booking form URL in Viking. You can find it in settings -> booking forms -> click the booking form -> Booking form URL: