Note: To place the new booking forms on your website you need administrator access and / or technical knowledge.
Getting your website ready
Do you have a WordPress site? Then you can easily place the booking forms on your website with our WordPress plugin. For other types of websites, you can use the instructions below.
Example
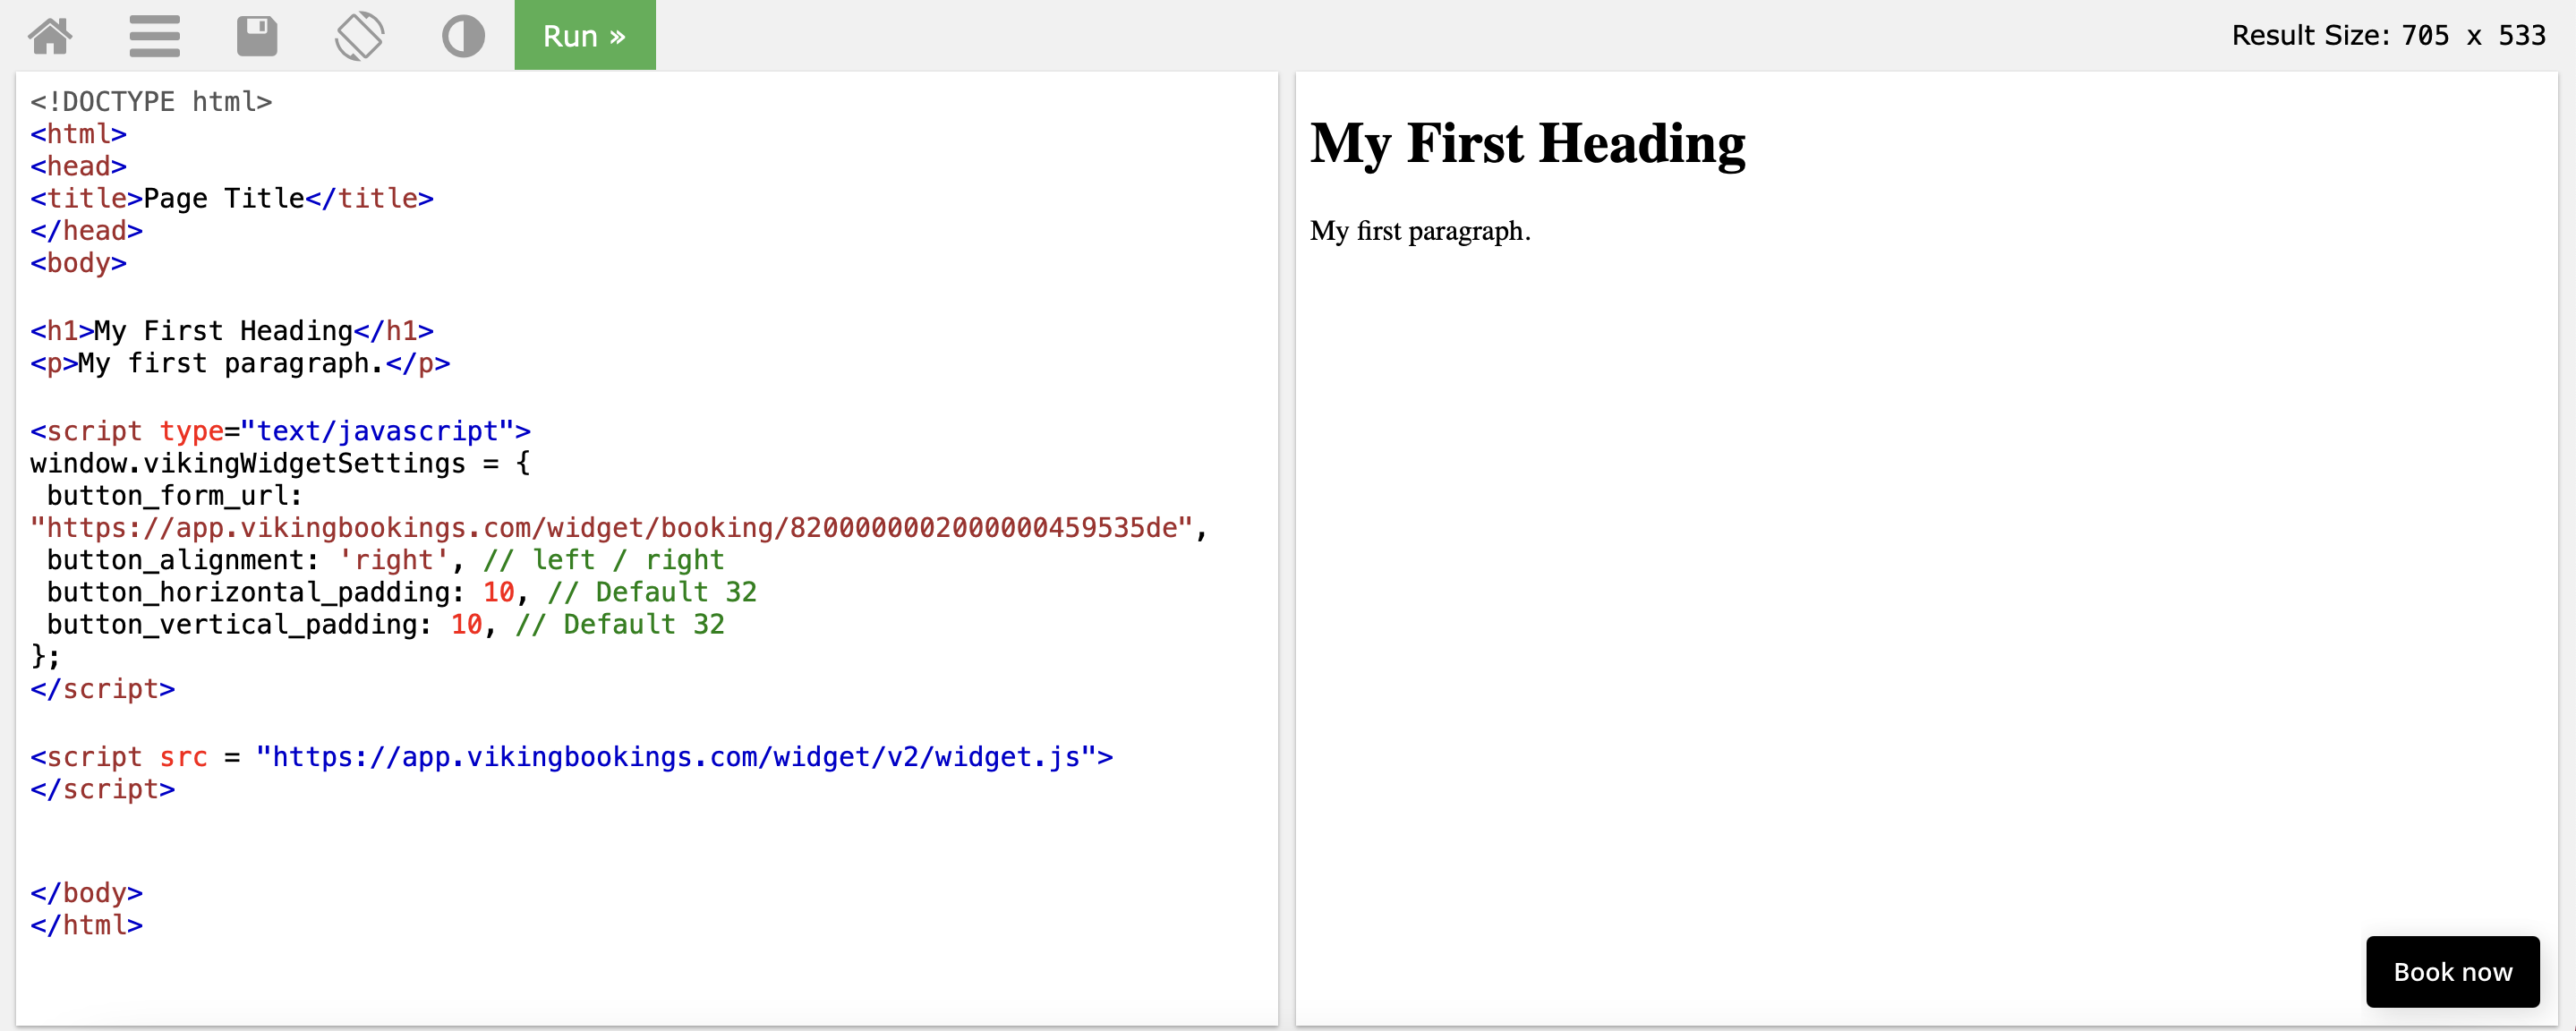
Example URL: https://www.w3schools.com/code/tryit.asp?filename=GNFEABY0L7VX
Step 1: Placing the widget code
Before the booking forms can be integrated on your website, you must first place the widget code in your website. For this you need basic knowledge of HTML.
Add the following code to the end of your document, just before the closing </body> tag:
With this code on your website you are ready to use the (new) booking forms.
Step 2: Opening a booking form
Step 2.1 With a button or a link
The (new) booking forms are opened by default in your website in a popup. In this way, the user has maximum attention for your offer. For this you use the standard link that you will find in the settings of booking forms. You can find it in settings -> booking forms -> click the booking form -> Booking form URL:
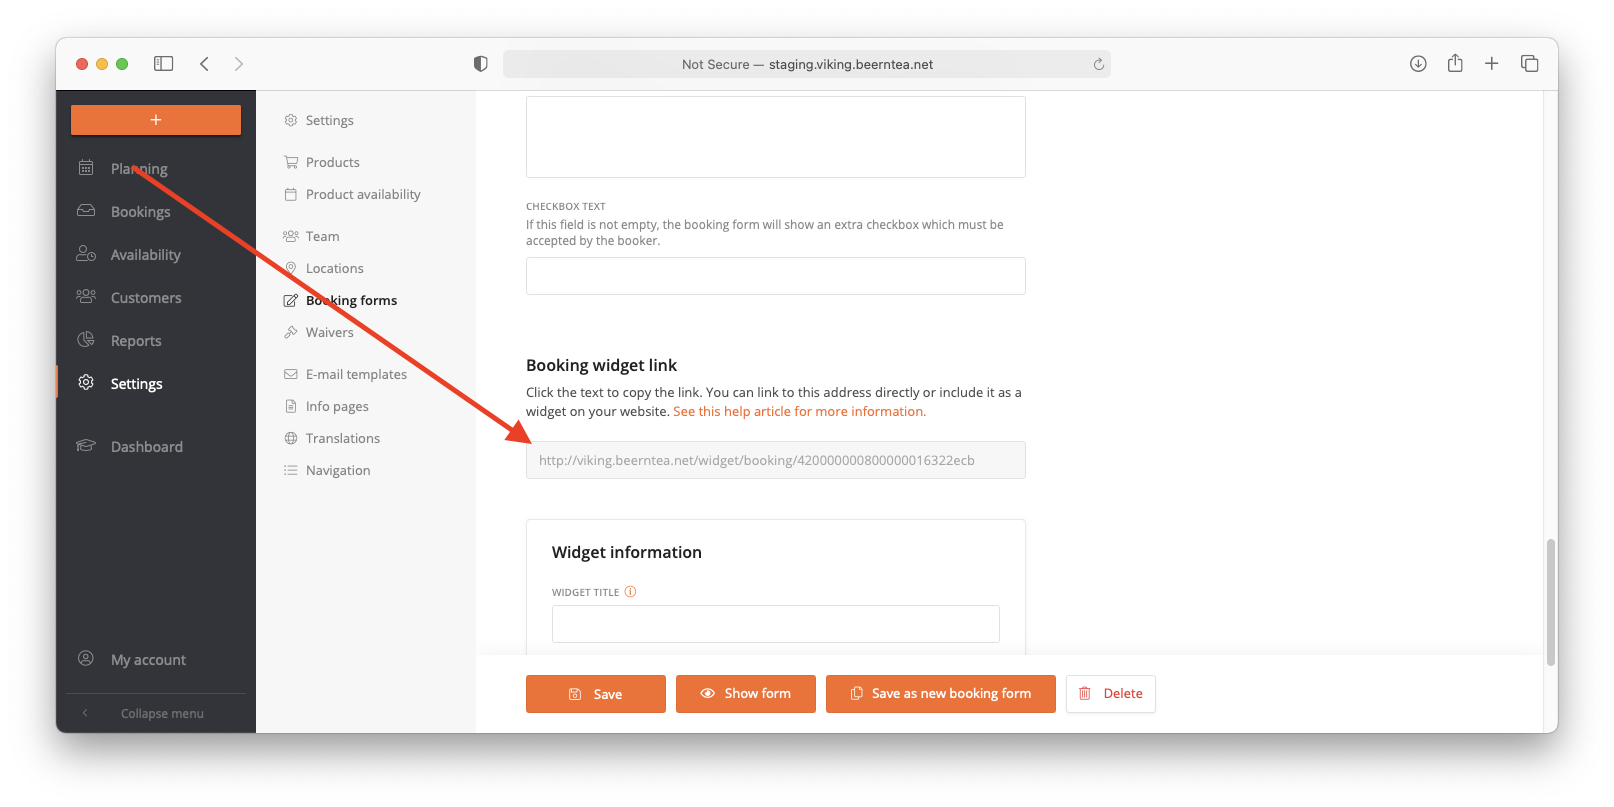
If you link a button or a text to this URL, the booking form will open in a popup.
Step 2.2 With a floating button
To use the floating button, you have to add the Javascript object before the script widget code in your website.
window.vikingWidgetSettings = {
button_form_url: "Add your booking form URL here",
button_alignment: 'right', // left / right
button_horizontal_padding: 10, // Default 32
button_vertical_padding: 10, // Default 32
style_color: '#000000'
};
</script>
As you can see, you can specify a number of settings, such as button alignment, padding and color. It is important to manually copy and paste your booking form URL in here.
The button_form_url field
You can find it in settings -> booking forms -> click the booking form -> Booking form URL:
Mobile button alignment
Note that alignment for the floating button on mobile screen can be determined in the Booking Form settings.